Side Dishes
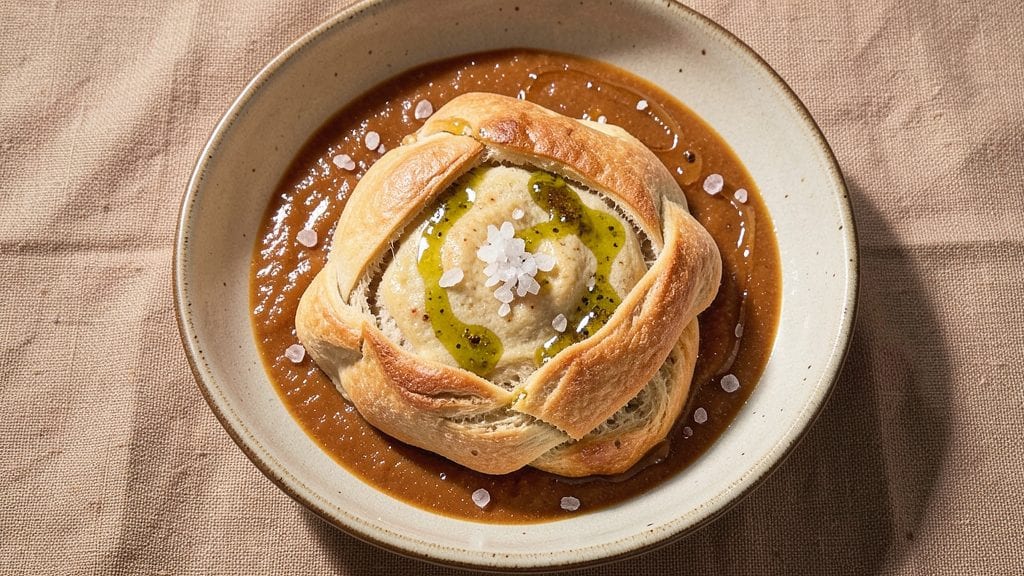
Fermented bread recipe transforms simple flour into a probiotic powerhouse with complex tangy flavors that store-bought loaves can't match. The key lies in a wild yeast starter that develops over days, creating a lighter crumb and deeper taste profile through natural fermentation.
I've perfected this method after years of experimenting with hydration levels and fermentation times—each adjustment makes a measurable difference in texture and digestibility.
This recipe delivers a crusty exterior with an open, airy crumb that stays fresh for days, thanks to the slow fermentation process. Unlike quick breads, fermented dough develops gluten strands that trap gas, resulting in a structure that's both sturdy and tender.
The tangy depth comes from lactic acid bacteria, which not only enhance flavor but also improve gut health—a win for both taste and nutrition.
What sets this bread apart is its versatility: use it for sandwiches, toast, or serve with soups and stews. The fermentation process allows for customization—add whole grains, seeds, or herbs to create your ideal loaf.
While traditional methods require patience, I've included a commercial starter shortcut for those short on time without sacrificing flavor.
Mastering fermentation means controlling temperature and hydration, but don't let that intimidate you. This recipe includes troubleshooting tips for common issues like overproofing or dense crumb, ensuring your first attempt yields a restaurant-quality loaf. Let's get started on creating bread that's as good for you as it is delicious.
Ingredients for fermented bread
Four cups flour, one active starter, and patience transform into a probiotic-rich loaf with restaurant-quality depth.
| Ingredient | Amount | Notes |
|---|---|---|
| Unbleached All-Purpose Flour 🌾 | 4 cups | King Arthur or Bob's Red Mill preferred |
| Wild Yeast Starter 🍞 | ½ cup | Active, bubbly starter (see notes) |
| Filtered Water 💧 | 1 ½ cups | Room temperature (70-75°F) |
| Diamond Crystal Kosher Salt 🧂 | 1 ½ tsp | Fine grain preferred |
| Honey 🍯 | 1 tbsp | Raw preferred for probiotic boost |
| Olive Oil 🫒 | ½ cup | Extra-virgin for crust development |
| Whole Wheat Flour 🌾 | ½ cup | Optional for added nutrition |
| Flaxseeds 🌱 | 1 tbsp | Ground for better absorption |
| Sesame Seeds 🌰 | 1 tbsp | Toasted for crunch (optional) |
| Commercial Yeast 🍞 | ¼ tsp | Instant yeast for shortcut version |
| Cornmeal 🌽 | ¼ cup | For dusting baking sheet |
| Ice Water ❄️ | ¼ cup | For final dough shaping |
The wild yeast starter is non-negotiable here—it's what creates that complex tangy flavor and probiotic benefits. For your first batch, grab a commercial starter from Bobs Red Mill or King Arthur to skip the week-long fermentation. If you're going wild (literally), mix equal parts flour and water, let sit at room temp for 5 days, then feed daily until bubbly. The flour matters too—King Arthur or Bob's Red Mill have the right protein structure for gluten development. Store-bought bread flour often has additives that interfere with fermentation.
No wild yeast starter? Instant yeast at half the amount works in a pinch, but you'll lose some of that authentic depth. Running low on honey? Maple syrup or agave keeps it vegan-friendly. Want extra nutrition? Swap half the all-purpose flour for whole wheat or rye. The flaxseeds add fiber—grind them fresh for best results, but pre-ground is fine. For the shortcut version, dissolve the instant yeast in warm water with honey first, then mix with dry ingredients. That little trick ensures even activation. The sesame seeds are optional but add crunch and visual appeal—toast them in a dry pan for 2 minutes first.
This dough is a beast—it needs time. Once mixed, let it rest at room temp for 1 hour, then refrigerate overnight (up to 3 days) for best flavor. The longer it ferments, the more tangy it gets. Shape your loaf on a floured surface, then let it proof for 1-2 hours until doubled in size. For a crispier crust, bake at 450°F for 20 minutes, then reduce to 375°F for 25-30 minutes until golden. Store wrapped at room temp for 3 days or freeze for 3 months. The flavor actually improves after 24 hours—trust the process.
Why You'll Love This Recipe
- No-Knead Magic: Honestly, this bread takes zero effort after mixing—just stir, cover, and let the wild yeast starter do all the work. The dough develops overnight, so you’re not stuck shaping it while dinner burns.
- Honey-Sweet Tang: That touch of honey isn’t just for flavor—it feeds the yeast and creates a subtle, caramelized depth when baked. The crust gets crisp, the crumb stays soft, and every slice tastes like a little treat.
- Weeknight Wonder: Between us, this is my go-to when I’m too tired for fancy bread but still want something better than store-bought. Toss a loaf in the oven while you prep dinner, and boom—homemade goodness without the fuss.
- Budget Stretch: Unbleached flour and a wild starter mean no pricey sourdough starters or specialty ingredients. One batch feeds the family for days, and the leftovers? Perfect for croutons, garlic bread, or toasted with jam.
Step-by-step instructions for fermented bread with probiotic depth
This method balances wild fermentation with commercial yeast for reliable results—every fold and rest creates that signature tangy crunch.
Combine Wet Ingredients and Activate the Starter
In a large mixing bowl, whisk together the 1.5 cups filtered water with the 0.5 cup wild yeast starter, 1 tbsp honey, and 0.5 cup olive oil. The mixture should be smooth with no visible flour—this is your fermented base. Let it sit at room temperature for 10-15 minutes while you prepare the dry ingredients. You'll notice tiny bubbles forming on the surface as the starter begins to activate.
This initial hydration kickstarts fermentation. The honey not only feeds the yeast but also adds subtle sweetness that balances the eventual tang. If you're using the optional 0.5 cup whole wheat flour, lightly toast it in a dry pan for 1 minute to enhance its nutty flavor before adding it to the dry mix later.
Mix and Autolyse for Gluten Development
Add the 4 cups unbleached all-purpose flour and 1.5 tsp diamond crystal kosher salt to the wet mixture. Using a wooden spoon or dough whisk, stir vigorously for 2-3 minutes until a shaggy dough forms. The goal here is to distribute the flour evenly without overworking it. Cover the bowl with a damp towel and let it rest for 30 minutes—this autolyse stage allows gluten to relax and develop naturally.
During this time, the dough will transform from stiff and crumbly to a more cohesive, slightly sticky mass. Press your finger gently into the dough—it should spring back slowly rather than immediately. This indicates proper gluten formation without overproofing. If the dough feels too dry, add 1-2 tablespoons of filtered water to maintain workability.
Incorporate Seeds and Fold for Strength
After the autolyse, sprinkle the 1 tbsp ground flaxseeds and 1 tbsp sesame seeds over the dough. Using a dough scraper, gently fold these seeds into the outer layers of the dough, working them in evenly. This step ensures the seeds are distributed throughout without breaking them down into a paste. Perform 3 sets of stretch-and-folds—every 30 minutes for 90 minutes total—to strengthen the gluten structure and encourage even fermentation.
For each fold, wet your hands slightly to prevent sticking, then grab one side of the dough, stretch it upward, and fold it over itself. Rotate the bowl and repeat this process on all four sides. The dough will become smoother and more elastic with each fold. If the dough feels too sticky after folding, lightly dust the surface with unbleached all-purpose flour—just enough to prevent sticking without over-drying.
Bulk Ferment with Controlled Conditions
After the final fold, cover the dough with a damp towel and let it bulk ferment in a warm environment (75-80°F) for 4-6 hours. The dough should rise by 50-75% of its original volume, with visible bubbles and a slightly domed top. To test readiness, perform the "poke test": gently press your finger into the dough—it should spring back slowly (not immediately) and leave a slight indentation. If the dough springs back quickly, it needs more time.
This fermentation stage develops the bread's complex flavor and probiotic benefits. For best results, place the dough in a proofing box or near a warm oven with the light on. Avoid overproofing—the dough should never collapse or develop a strong, sour aroma. If your kitchen is cooler, extend the fermentation time by 1-2 hours to compensate.
Shape, Rest, and Bake for Crispy Crust
Lightly dust a clean work surface with 0.25 cup cornmeal and turn out the dough. Gently shape it into a round boule by pulling the edges toward the center and tucking them underneath. For a more rustic look, you can shape it into a batard (oval) or leave it as a free-form loaf. Place the shaped dough on a parchment-lined baking sheet, seam-side up, and cover it loosely with a towel. Let it rest for 30 minutes at room temperature to relax the gluten before baking.
Preheat your oven to 425°F with a baking stone or inverted baking sheet inside for 45 minutes. Once preheated, score the dough with a sharp razor or lame—cutting ¼-inch deep in a simple pattern (like a cross or diagonal). Immediately transfer the dough to the hot stone and bake for 25-30 minutes, rotating the pan halfway through, until the crust is deep golden brown and sounds hollow when tapped on the bottom. For extra crispiness, spray the oven walls with 0.25 cup ice water during the last 5 minutes of baking to create steam.
Cool and Enjoy for Maximum Flavor
Remove the bread from the oven and let it cool on a wire rack for at least 1 hour before slicing. This resting period allows the crumb to set and the flavors to meld. The interior should be soft and slightly tangy, with a crisp exterior that gives way to a chewy texture. For best results, store the bread in a paper bag at room temperature for up to 3 days—the crust will continue to crisp up as it stales.
Slice the bread and serve warm with olive oil and flaky salt for dipping, or toast it to enhance the nutty flavors from the whole wheat flour. The probiotic benefits of the wild yeast starter will be most potent when consumed fresh, so enjoy it within the first 24 hours for optimal digestion and flavor.
Pro Tips For Making Fermented Bread
- Test Starter Daily: Your wild yeast starter needs consistency—feed it the same ratio (1:1:1 flour/water/discard) at the same time every day for at least 5 days before baking. I learned this the hard way when my starter took 10 days to stabilize, and the bread turned out dense instead of airy. Trust the routine.
- Weigh Your Flour: Scooping flour leads to inconsistent hydration and dough behavior. Use a kitchen scale for precise measurements—100g of unbleached all-purpose flour is far more reliable than a "cup" (which varies wildly). I switched after my first batch collapsed during proofing because I’d packed the flour too tightly.
- Skip the Honey Rush: Adding honey late in fermentation (within the last 2 hours) prevents it from feeding the yeast too aggressively. I used to mix it in at the start, and my dough would overproof before the oven even warmed up. A little patience here keeps your crust crisp without a gummy crumb.
- Bulk Ferment Cold: After initial mixing, let the dough ferment in the fridge for 12–16 hours (yes, overnight). The slow rise develops deeper flavor and easier handling—no more fighting sticky, overproofed dough in the morning. I was skeptical until I tried it, and now I never bake without this step.
Troubleshooting your fermented bread
Flat Dough? Fix It
If your dough refuses to rise during bulk fermentation, check your starter activity first. A flat dough often means the yeast is sluggish—either from being too cold (below 70°F) or overfed (too much flour in the starter).
Feed your starter 1:1:1 ratio (flour:water:starter) 2 hours before using, and keep it in a warm spot (75-80°F). If using commercial yeast, ensure it's fresh (within 6 months) and dissolved in warm (105-110°F) water with honey.
For dough that rises but collapses after shaping, you've likely overproofed it. The "poke test" should leave a slow, slight indentation—if it springs back immediately, return the dough to ferment for 30-60 more minutes.
If it's already collapsed, reshape it gently and let it proof again for 1-2 hours in a warmer environment. 🌡️
Dense Crumb? Adjust Hydration
A dense, heavy crumb usually means underdeveloped gluten or too much flour. Start by measuring your flour accurately—spoon it into the cup and level off (don't scoop directly from the bag).
If your dough feels dry and crumbly after mixing, add 1-2 tablespoons filtered water at a time until it's just sticky. For better gluten development, perform 3 sets of stretch-and-folds (every 30 minutes during bulk fermentation) instead of just one.
If you're using whole grains (like the optional 0.5 cup whole wheat flour), they absorb more water—reduce hydration by 5-10% (about 15-30ml) to compensate. Also, ensure your starter is fully active (doubled in size with bubbles) before mixing—weak starters weaken gluten structure. 💪
Sticky Dough Nightmare
Sticky dough isn't necessarily bad—it just needs better handling. First, wet your hands before touching the dough to prevent tearing the gluten strands. If it's too sticky to shape, add 1 tablespoon flour at a time while folding, but don't overdo it (too much flour = tough bread).
For shaping, use a dough scraper to lift and fold edges rather than pressing with your hands.
Pro tip: Chill the dough for 30 minutes before shaping if your kitchen is warm—this firms it up. When rolling into a boule, tuck the edges tightly under the center to trap gas.
If it still feels too sticky, dust your work surface with semolina or rice flour (they're less likely to burn during baking than all-purpose flour). 🍞
Pale Crust? Steam It Up
A pale, soft crust usually means insufficient steam during baking. Preheat your oven with a baking stone or steel for 45 minutes to mimic a home oven's heat retention.
Before baking, score the dough and spray the oven walls with ice water (or place a tray of boiling water on the bottom rack) for the first 5 minutes to create steam. This helps develop a crisp, golden crust.
If your oven runs hot, reduce the temperature by 25°F and bake for 5-10 minutes longer. For extra color, brush the crust with melted butter or olive oil after the first 10 minutes of baking.
Avoid opening the oven door during the first 20 minutes—temperature drops cause steam to escape, leading to a pale crust. 🔥
Sour Smell? Save Your Loaf
A strong, sour aroma during bulk fermentation means overproofing or too much lactic acid from an overfed starter. If the dough smells like vinegar or rot, it's past saving—but you can often rescue it by reshaping and baking immediately (skip the final proof).
For future batches, reduce fermentation time by 1-2 hours or lower the temperature to 70-72°F to slow yeast activity.
To prevent this, feed your starter less frequently (every 12 hours instead of daily) and use less flour in the feedings. If using commercial yeast, reduce the amount by 25% (to 0.1875 tsp) to avoid overfermentation.
A properly fermented dough should smell slightly tangy but pleasant, like yogurt or fresh sourdough. 🤤
Nutrition facts
Frequently asked questions
What’s the difference between a wild yeast starter and commercial yeast?
Wild yeast starters use natural microbes from flour and water, creating complex flavors over days. Commercial yeast is instant and predictable—ideal for beginners. The starter version develops deeper tanginess and probiotics, while commercial yeast speeds up fermentation. For this recipe, you can use either, but the starter delivers restaurant-quality depth.
How do I know when my dough is properly proofed?
Perform the "poke test": gently press your finger into the dough—it should spring back slowly (not immediately) and leave a slight indentation. Overproofed dough collapses when poked, while underproofed dough springs back quickly. Aim for a 50-75% rise during bulk fermentation.
Can I make this bread without a baking stone?
Use an inverted baking sheet or a thick metal pan to mimic a stone’s heat retention. Preheat your oven with it inside for 45 minutes to maximize crust development. For extra crispiness, spray oven walls with ice water during the first 5 minutes of baking.
Why does my fermented bread taste bland?
Bland flavor often means underfermentation—extend bulk fermentation by 1-2 hours or increase starter volume to 0.75 cup. For extra depth, add 1 tsp apple cider vinegar or 1 tbsp molasses to the dough. Also, ensure your starter is fully active (doubled in size with bubbles) before mixing.
How long can I store fermented bread?
Wrap the cooled loaf in a paper bag and store at room temperature for 3-5 days. The crust crisps up as it stales, and the flavor improves over time. For longer storage, freeze slices for up to 3 months—thaw at room temperature for 1-2 hours before toasting.