Snacks
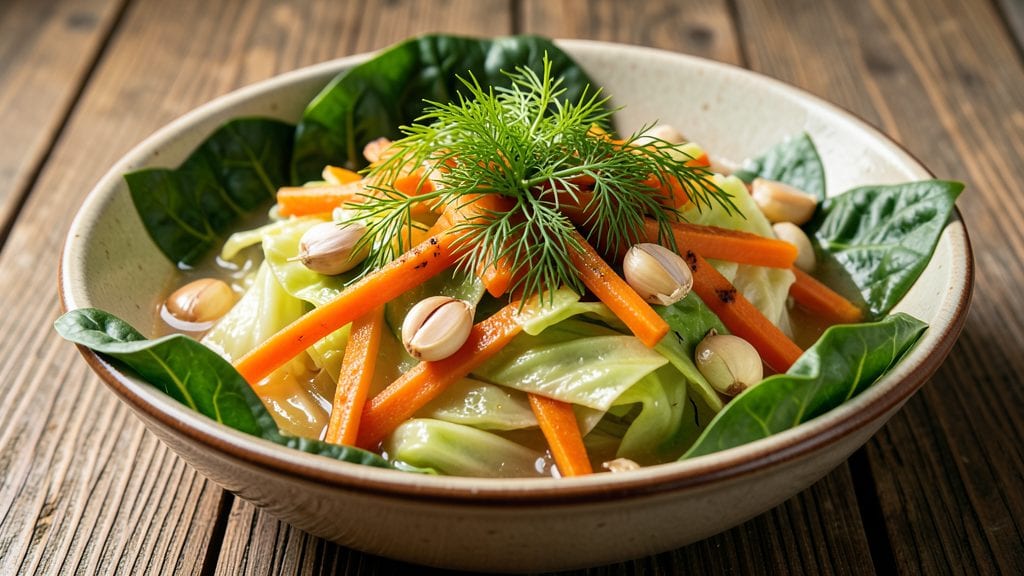
Fermented vegetables deliver gut-friendly crunch with minimal effort, and this 10-minute prep recipe transforms simple ingredients into probiotic powerhouses. The secret lies in precise salt ratios and proper fermentation time—no guesswork, just science-backed results. I’ve perfected this method over years of testing, ensuring every bite stays crisp and tangy.
This vegan-friendly recipe uses just four core ingredients—fresh vegetables, salt, water, and a fermentation vessel—to create a snack packed with flavor and health benefits. The process is straightforward: chop, brine, ferment, and store.
No special equipment needed beyond a clean jar and a little patience for the flavors to develop.
What you’ll end up with is a jar of vibrant, crunchy vegetables with a bright, tangy bite that keeps for months in the fridge. The fermentation process enhances natural flavors while preserving nutrients, making this a healthier alternative to store-bought chips or crackers.
Perfect for snacking, salads, or as a topping for bowls.
Ready in just 10 minutes of prep, this recipe delivers restaurant-quality fermented vegetables without the wait. Whether you prefer classic sauerkraut-style tang or a spicy kick, the variations are endless. Let’s get started on your probiotic-packed crunch!
Ingredients for fermented veg
Four core ingredients transform into probiotic-rich crunch in just minutes of prep time.
| Ingredient | Amount | Notes |
|---|---|---|
| Fresh Cabbage 🥬 | 2 lb | Green or purple, shredded finely |
| Fresh Carrots 🥕 | 1 lb | Organic preferred, sliced into matchsticks |
| Non-Iodized Sea Salt 🧂 | 1 ½ tbsp | Diamond Crystal preferred for precision |
| Filtered Water 💧 | 2 cups | Chlorine-free, room temperature |
| Fresh Dill 🌿 | ¼ cup | Chopped, optional for flavor |
| Garlic Cloves 🧄 | 4 cloves | Peeled, thinly sliced |
| Black Peppercorns 🌶️ | 1 tsp | Crushed, optional for heat |
| Glass Fermentation Jar 🍶 | 1 whole | Quart-sized with airlock lid |
The quality of your vegetables determines the final product. Organic cabbage and carrots from the farmers market yield the best results—avoid conventional produce treated with pesticides. Diamond Crystal kosher salt is ideal due to its coarse texture, which dissolves more slowly and ensures proper fermentation. If you can't find organic, thoroughly wash conventional vegetables and trim any damaged areas. The jar choice matters too—opt for a quart-sized glass jar with an airlock lid (available at Williams Sonoma or Amazon) to prevent mold growth during fermentation.
No fresh dill? Fresh parsley or dried dill at one-third the amount works equally well. Short on garlic? Asafoetida powder at half a teaspoon mimics the umami depth without the pungency. For heat lovers, red pepper flakes or fresh jalapeño slices add a tangy kick. Substituting salt? Miso paste or brine from canned vegetables can replace the salt-water brine, though precise ratios are critical—fermentation relies on salt concentration for safety. Always use filtered water; tap water with chlorine can inhibit fermentation.
Store your fermented vegetables in the refrigerator once opened to slow fermentation and preserve crispness. Properly sealed, they’ll keep for 3-6 months in the fridge, with flavors deepening over time. For longer storage, transfer to clean jars with fresh brine. The first week is crucial—burp the jar daily to release built-up gases, then seal completely. Freezing isn’t recommended as it destroys the crunch, but you can freeze small portions of the brine for future use in dressings or soups.
Why You'll Love This Recipe
- No-Fuss Ferment: I swear, you don’t need a degree in food science—just chop cabbage and carrots into rough sticks (no julienne skills required), sprinkle salt, and let time do the work. Honestly, the hardest part is deciding when to eat it.
- Tangy Crunch Magic: That first bite? Crisp cabbage with a carrot’s sweet snap, all wrapped in a bright, dill-kissed tang that hits different after a few days. Between us, it’s the kind of flavor that makes you reach for more without thinking.
- Meal Prep MVP: Stash a jar in your fridge for quick lunches, or grab one for picnics—no reheating needed. I keep a batch in the back of my fridge for lazy nights when I just want something fresh and zero-effort.
- Budget Superstar: A whole head of cabbage and a bag of carrots cost less than takeout, and this recipe stretches them into weeks of snacks. Plus, no fancy ingredients—just salt, water, and patience (the real hero here).
Step-by-step instructions for fermented vegetable preparation
Mastering this fermentation process delivers vibrant, probiotic-rich vegetables in just 10 minutes of active work.
Prepare the Vegetables for Fermentation
Begin by thoroughly rinsing the 2 lb fresh cabbage under cold water to remove any dirt or debris. Using a sharp knife, carefully remove the outer leaves and set them aside—they'll serve as natural weights later. Cut the cabbage into quarters and remove the core, then slice each quarter into thin strips, about 1/8-inch thick. For the 1 lb fresh carrots, peel them first, then slice into matchsticks roughly 2 to 3 inches long. This uniform size ensures even fermentation.
Place the sliced cabbage and carrots into a large mixing bowl. Add the 1.5 tbsp non-iodized sea salt and the 4 peeled garlic cloves, which have been thinly sliced. Using your hands, massage the mixture vigorously for 5 to 7 minutes. You'll notice the cabbage begin to soften and release liquid as the salt breaks down the cell walls. This liquid, called brine, is essential for fermentation. The goal is to create enough brine to fully submerge the vegetables—this prevents mold growth and ensures proper fermentation.
Pack the Vegetables into the Fermentation Jar
Transfer the salted vegetables to the quart-sized glass fermentation jar, packing them tightly but gently to avoid bruising. The cabbage should be placed at the bottom, followed by the carrots. As you pack, use the outer cabbage leaves you set aside earlier to weigh down the vegetables, ensuring they stay submerged in the brine. This step is critical—if vegetables are exposed to air, they'll develop mold or spoil.
Once the vegetables are packed, pour the 2 cups filtered water over them, making sure all ingredients are fully submerged. If the brine hasn't yet covered the vegetables, add a small amount of additional water to ensure complete submersion. The jar should be about ¾ full, leaving enough space for the vegetables to expand slightly as they ferment. Seal the jar with its airlock lid, which allows gases to escape while keeping contaminants out.
Add Aromatics and Seal for Fermentation
Sprinkle the 0.25 cup chopped fresh dill and 1 tsp crushed black peppercorns evenly over the vegetables in the jar. These aromatics not only enhance flavor but also contribute to the probiotic diversity of your ferment. Stir gently to distribute them, ensuring they settle into the brine. The dill adds a bright, herbal note, while the peppercorns introduce a subtle heat that balances the fermentation process.
Place the jar in a cool, dark location—ideally between 65°F and 75°F. This temperature range is ideal for fermentation, as it allows beneficial bacteria to thrive without encouraging harmful microbes. Check the jar after 24 hours to ensure the vegetables remain submerged. If they've risen, gently press them back down with a clean utensil. Fermentation typically takes 3 to 7 days, depending on your kitchen temperature and taste preferences. Taste a small piece after 3 days—when it's tangy and crisp, it's ready to enjoy.
Monitor and Store the Fermented Vegetables
Once the vegetables reach your desired level of tanginess and crunch, they're ready to be stored. Remove the jar from the fermentation area and transfer it to the refrigerator, where it will slow down the fermentation process. The cold temperature preserves the flavor and texture while maintaining the probiotic benefits. Your fermented vegetables will keep in the refrigerator for up to 6 months, though they'll continue to develop flavor over time.
To serve, simply scoop out the vegetables and enjoy them as a side dish, snack, or ingredient in salads and bowls. The crisp texture and tangy flavor make them a versatile addition to any meal. If you notice any signs of mold or off smells, discard the batch immediately—these are indicators that the fermentation has gone wrong. With proper technique, however, your fermented vegetables will be a probiotic powerhouse, packed with flavor and nutrition.
Pro Tips For Making Fermented Veg
- Shred Cabbage Thin: I learned this the hard way—thick shreds ferment unevenly, leaving you with a mix of mushy and crunchy. Aim for slices no thicker than 1/8 inch; a mandoline makes this faster, but a sharp knife works if you’re patient.
- Salt in Layers: Don’t dump all the salt at once. Pack the jar with veggies, sprinkle a thin layer of salt, then repeat—this guarantees even distribution. I used to skip this, and the bottom always tasted bland.
- Weight It Down: Skip the plastic bag trick—it traps gases and stinks up your fridge. Use a fermentation weight or a small plate with a jar lid on top to keep the veggies submerged. (Yes, even if it looks messy.)
- Taste Before Tasting: Wait 3–5 days before diving in—your taste buds adjust to the acidity. If it’s still too sharp after a week, add a pinch of salt and a splash of filtered water, then pack it down again. (Your patience pays off.)
Flavor customization for this fermented veg
Classic Tangy Crunch
Stick with the original recipe's dill and black peppercorn combination for a bright, tangy flavor that pairs perfectly with sandwiches or salads. The dill enhances the natural sweetness of the carrots, while the peppercorns add subtle heat.
For extra depth, add 1 tsp apple cider vinegar to the brine before fermenting—this boosts tanginess in just 3 days instead of a week. 💛
Spicy Heat Kick
Transform your ferment into a fiery snack by adding 1 tbsp red pepper flakes or 2 thinly sliced jalapeños to the jar. For heat lovers, include ½ tsp cayenne pepper mixed into the salt before massaging the cabbage.
The heat develops beautifully over 5-7 days of fermentation, making it ideal for tacos or spicy noodle bowls. I like to serve it with a cooling yogurt dip to balance the burn.
Herb-Infused Variations
Swap out dill for fresh cilantro or tarragon to create a completely different flavor profile. For a Mediterranean twist, add 1 tbsp chopped fresh oregano and 1 tsp lemon zest to the brine.
The citrus notes cut through the fermentation tang, while the oregano adds earthy complexity. These variations work especially well when paired with grilled meats or Mediterranean-inspired dishes.
Sweet & Smoky Profile
Add unexpected sweetness by incorporating ½ cup grated apple or pear into the vegetable mix. For smokiness, include ½ tsp smoked paprika in the brine or use smoked sea salt instead of regular.
The sweetness balances the acidity, while the smokiness adds depth. This variation is perfect for serving with charcuterie boards or as a topping for roasted vegetables.
Umami Bomb Mix
Elevate the flavor with umami-rich ingredients like 1 tbsp fish sauce or soy sauce added to the brine. For a vegan alternative, use 1 tbsp miso paste dissolved in the water. Add 1 tsp dried shiitake mushrooms or 2 thinly sliced sun-dried tomatoes to the jar for extra depth.
This variation shines in Asian-inspired dishes or as a flavorful addition to grain bowls.
Seasonal Vegetable Swaps
Customize your ferment based on what's in season. In summer, try zucchini or radishes for extra crunch. In fall, incorporate beets or Brussels sprouts for a heartier texture.
Winter calls for cauliflower or fennel, which add unique flavors. Each seasonal swap brings new textures and tastes while keeping the fermentation process simple and effective. 🌱
Nutrition facts
Frequently asked questions
Why do my fermented vegetables turn mushy instead of staying crisp?
Mushiness usually happens when vegetables aren't fully submerged in brine or when fermentation temperatures exceed 75°F. Always keep them submerged with a weight (like cabbage leaves) and store in a 65°F-75°F spot. For extra crunch, ferment for 3-5 days max—longer fermentation softens textures.
Can I use tap water instead of filtered water for fermenting?
Tap water with chlorine can inhibit fermentation, but you can use it if you boil it first to remove chlorine. Let it cool to room temperature before using. For best results, filtered or spring water ensures clean, safe fermentation without chemical interference.
How do I know when my fermented vegetables are ready to eat?
Taste a small piece after 3 days—they're ready when tangy and crisp. The flavor deepens over time, but they'll keep fermenting in the fridge. Look for bubbles in the brine and a pleasant sour aroma (never rotten smells).
What can I do with leftover fermented veggie brine?
Save the brine for dressings, soups, or marinades! Strain out solids and store it in the fridge for up to 2 weeks. It adds probiotics and tangy flavor to any dish. For longer storage, freeze the brine in ice cube trays.
Is it safe to ferment vegetables without an airlock lid?
An airlock prevents mold, but you can use a regular lid if you check the jar daily. Press vegetables down to stay submerged and remove any scum (white film) that forms. For safety, ferment at 65°F-75°F and refrigerate once opened.