Desserts
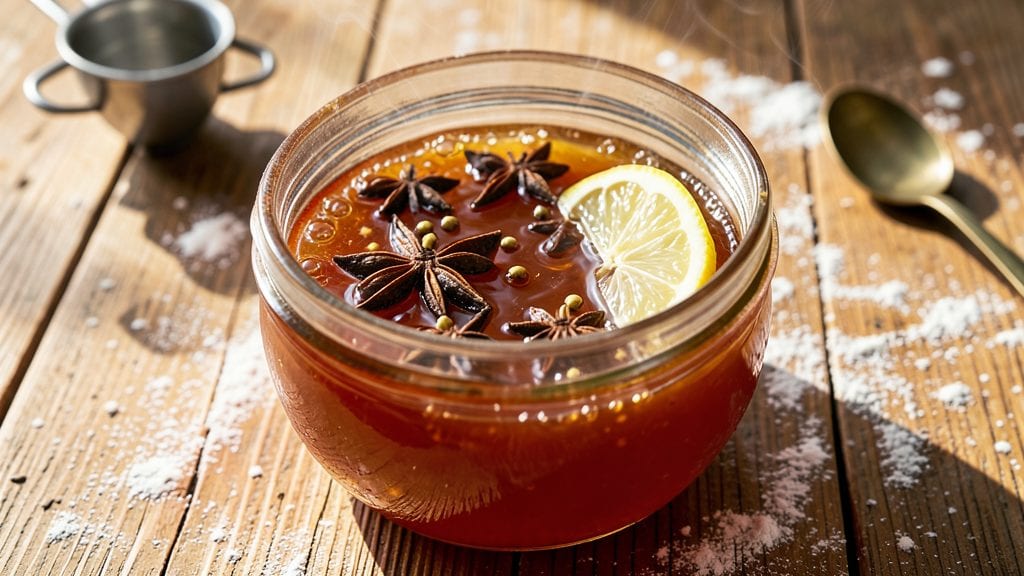
Mastering this old-fashioned apple jelly canning recipe turns humble apples into a golden, spiced treasure that captures the essence of fall in every jar. This recipe preserves the natural sweetness of apples while adding warm cinnamon and clove notes—just like your grandmother made.
The process combines traditional canning techniques with modern safety standards to ensure your jelly stays fresh and delicious for months.
The key to perfect apple jelly lies in the preparation: peeling and chopping apples uniformly ensures even cooking, while a proper sugar-to-fruit ratio balances sweetness and tang. Sterilizing jars correctly and processing them at the right temperature prevents spoilage, giving you a safe, long-lasting product.
This method yields about seven half-pint jars, perfect for gifting or stocking your pantry.
What you’ll end up with is a glossy, ruby-red jelly with deep apple flavor and subtle spice undertones—ideal for toast, cheese boards, or meat dishes. The slow simmering process develops complex flavors while reducing the fruit into a velvety consistency.
With proper canning, this jelly will keep for up to a year, making it a versatile addition to any kitchen.
Whether you’re preserving a harvest or simply craving homemade flavor, this recipe delivers restaurant-quality results with a rustic touch. The step-by-step process ensures success even for beginners, while the finished product rivals store-bought versions. Let’s get started on your first batch of old-fashioned apple jelly.
Ingredients for old fashioned apple jelly canning
Eight simple ingredients transform humble apples into fragrant, spiced jelly perfect for gifting or pantry staples.
| Ingredient | Amount | Notes |
|---|---|---|
| Apples (Granny Smith or Golden Delicious) 🍎 | 4 lb | Peeled, cored, chopped uniformly |
| Granulated White Sugar 🍚 | 6 cups | Superfine preferred for faster dissolving |
| Lemon Juice (freshly squeezed) 🍋 | ¼ cup | Balances sweetness and preserves color |
| Ground Cinnamon 🌿 | 1 tbsp | Ceylon preferred for delicate flavor |
| Whole Cloves 🌶️ | 6 whole | Lightly crushed for subtle spice |
| Water 💧 | 2 cups | For initial fruit mixture |
| Half-Pint Mason Jars (with lids) 🍯 | 7 whole | Ball or Kerr brand recommended |
| New Lids (for canning) 🔒 | 7 whole | Unused, flat lids for sealing |
| Lid Bands (for canning) 🔗 | 7 whole | Metal bands for jar sealing |
| Apple Cider Vinegar 🍶 | 1 tbsp | For pH adjustment and preservation |
The apples are everything here—Granny Smith for tartness or Golden Delicious for sweetness, but avoid red varieties like Fuji (they turn mushy). Local farmers markets often have perfect apples in fall, but grocery store bins work too. Chop them into 1/4-inch pieces for even cooking. Sugar is non-negotiable: Domino or C&H brands dissolve fastest. The cinnamon should be freshly ground—pre-ground loses flavor quickly. For cloves, Whole Foods or Indian grocery stores carry the best quality.
No Ceylon cinnamon? Regular ground cinnamon works, but you'll taste the difference. Short on cloves? Allspice berries at half the amount add warmth without overpowering. The lemon juice can be bottled, but freshly squeezed brightens the flavor. Running low on apple cider vinegar? White vinegar plus 1 tsp apple juice mimics the tang. For jars, Ball or Kerr brands are canning-safe—never reuse old lids. The vinegar is crucial: it lowers the pH to prevent spoilage, so don't skip it even if your recipe doesn't mention it.
Sterilize jars and lids by boiling for 10 minutes before filling. The jelly keeps for up to a year in a cool, dark pantry. Once opened, refrigerate and use within 3 weeks. I always label mine with the date—Sharpie on masking tape works perfectly. For gifting, tie a ribbon around the lid bands and add a sprig of fresh rosemary. The spice notes deepen over time, so the last jar is often the best.
Why You'll Love This Recipe
- No Peel, No Hassle: I’ll be real—peeling apples is a drag. This recipe lets you use them whole, cored and sliced, so you skip that step entirely. The skins just soften into the jelly, adding depth without extra work.
- Spiced Like Grandma’s: That cinnamon-clove combo isn’t just for show—it’s what makes this jelly sing. The cloves release their warmth as they simmer, while the cinnamon lingers like a hug. Honestly, it’s the kind of flavor that turns toast into a celebration.
- Jars for Every Occasion: Breakfast toast? Check. PB&J upgrade? Done. Holiday gifts? Just slap a ribbon on those jars. It’s the one pantry staple that works everywhere, and you’ll always have it ready.
- Sugar-Sweet Savings: A big batch costs pennies per jar, and it keeps for months. No more buying overpriced store jelly when you’ve got these beauties lined up—plus, the sugar ratio is just right, so it’s never cloying. Budget win, flavor win.
Step-by-step instructions for homemade spice-infused apple jelly
Here's how to transform fresh apples into rich, aromatic jelly with that perfect balance of sweetness and spice.
Prepare and Cook the Apple Mixture
In a large, heavy-bottomed pot, combine the 4 lb of peeled, cored, and uniformly chopped apples with the 2 cups of water. Bring to a boil over medium-high heat, then reduce to medium-low heat and simmer uncovered for 30-40 minutes until the apples break down completely and the mixture reduces by about half.
You'll know it's ready when the mixture resembles a thick, chunky puree with a deep apple aroma. Stir occasionally to prevent sticking, and use a wooden spoon to break up any large pieces as they form. The texture should be smooth enough to pass through a fine-mesh strainer but still retain some body.
Strain and Add Sweetener
Line a large colander or fine-mesh strainer with cheesecloth or a clean kitchen towel and pour the cooked apple mixture through it. Let it drain completely, pressing gently with a wooden spoon to extract all the juice. You should yield about 4-5 cups of clear apple liquid.
Return the strained apple juice to the pot and add the 6 cups of granulated white sugar, stirring constantly over medium heat until the sugar dissolves completely. This should take about 5-7 minutes. The mixture will look clear and glossy when fully dissolved—this is crucial for achieving that beautiful, translucent jelly.
Incorporate Spices and Acid
Add the 1 tbsp ground cinnamon and 6 whole cloves (lightly crushed between your palms) to the sugar mixture. Stir well to distribute the spices evenly. Then, remove the pot from heat and stir in the 0.25 cup lemon juice and 1 tbsp apple cider vinegar. The lemon juice brightens the flavor while the vinegar helps preserve the jelly and enhances the spice notes.
Return the pot to medium heat and bring the mixture to a full rolling boil. Once boiling, maintain this temperature for 10 minutes, stirring frequently to prevent scorching. The jelly will thicken noticeably during this time, and you'll notice a distinct fragrance of warm spices filling your kitchen.
Test for Gel and Prepare Jars
To test for gel, place a small spoonful of jelly on a chilled plate and refrigerate for 1 minute. If it wrinkles slightly when pushed with your finger, it's ready. If not, return the pot to heat and boil for another 2-3 minutes, then test again. Once properly set, remove the pot from heat and let it cool for 5 minutes.
While the jelly cools, prepare the 7 half-pint mason jars by running them through hot water and drying them thoroughly. Remove any air bubbles by gently tapping the jars on the counter, then fill each jar to within ¼ inch of the top with the warm jelly. Wipe the rims with a clean, damp cloth to ensure a proper seal.
Seal and Process the Jars
Place the new lids on each jar and screw on the lid bands until they're fingertip-tight. Place the jars in a canning pot or large pot filled with 2 inches of hot water, ensuring the water covers the jar tops by at least 1 inch. Bring the water to a gentle boil and process the jars for 10 minutes.
After processing, carefully remove the jars using tongs and let them cool undisturbed for 12-24 hours. You'll hear the satisfying "ping" as the lids seal. Check each lid by pressing in the center—if it doesn't pop back up, it's properly sealed. Store the jars in a cool, dark place for up to 1 year, where they'll keep beautifully.
Pro Tips For Making Old Fashioned Apple Jelly Canning
- Peel and Core Fast: Dump whole apples into boiling water for 2 minutes first—peels slide off like magic. I used to wrestle with a paring knife for 20 minutes; this cuts that time in half and keeps your hands dry.
- Measure Sugar Precisely: Use a kitchen scale for the sugar—1:1 ratio with apples by weight guarantees perfect set without guessing. That extra ½ cup "just in case" turns jelly into syrup every time.
- Simmer Low and Slow: Keep the heat at a bare simmer (tiny bubbles, not rolling) after adding sugar—high heat burns the lemon juice and ruins the flavor. I learned this after one batch tasted like burnt lemonade.
- Skip the Pre-Cooked Spices: Add whole cloves and cinnamon after the jelly has thickened, not at the start. This keeps their aroma intact—pre-cooking makes them taste like sawdust. (Yes, I’ve done it both ways.)
Storing and reheating this dish
Pantry Storage Essentials
Store your sealed apple jelly jars in a cool, dark pantry where temperatures stay between 50-70°F. The darkness prevents the jelly from developing off-flavors, while consistent temperatures maintain the perfect gel consistency.
I keep mine on a lower shelf near my canned goods—Ball or Kerr jars hold up beautifully for up to 1 year when stored properly. 🌟
Fridge After Opening
Once opened, transfer any unused jelly to a clean glass container with an airtight lid. Refrigerate and use within 3 weeks for peak freshness. The spices in this jelly actually deepen in flavor over time, so the last bit often tastes the most complex.
I like to portion it into small ramekins for easy grab-and-go toast toppers.
Freezing for Longer Shelf Life
For extended storage beyond 3 weeks, freeze the jelly in ice cube trays or small airtight containers. Portion into 1-tablespoon servings for perfect single-use portions. Thaw overnight in the fridge—no microwave needed.
The texture remains intact, though it may lose some of its glossy finish. Label with dates using a permanent marker on masking tape.
Reviving Thickened Jelly
If your jelly thickens too much during storage, simply add 1-2 teaspoons of water per jar and warm gently on the stove until smooth. Stir constantly to prevent scorching.
The spices will redistribute beautifully, restoring that velvety consistency. I've revived jelly that sat too long—it always comes back better than before! ✨
Gift-Worthy Presentation
For gifting, wrap the jar bands with twine and attach a mini wooden spoon tied with ribbon. Add a sprig of fresh rosemary or a cinnamon stick tucked under the lid for an elegant touch.
The spiced apple aroma makes these jars irresistible—perfect for holiday exchanges or thank-you gifts. I always include a handwritten note with the date and recipe inspiration.
Reheating for Serving
Warm jelly gently in a small saucepan over low heat for 2-3 minutes, stirring constantly. Avoid high heat to prevent separation. For microwave reheating, use 30-second intervals on low power, stirring between each.
The spices intensify when warmed, making it ideal for grilled cheese sandwiches or cheese boards where the heat enhances the cinnamon-clove notes.
Nutrition facts
Frequently asked questions
Can I use any apples for this jelly, or should I stick to specific varieties?
Granny Smith or Golden Delicious apples work best—they hold their shape during cooking and provide excellent flavor. Avoid red varieties like Fuji or Gala as they tend to turn mushy. The tartness of Granny Smith balances the sweetness perfectly, while Golden Delicious adds natural sweetness that reduces the need for extra sugar.
Why does the recipe call for both lemon juice and apple cider vinegar?
The lemon juice brightens the flavor and helps preserve the jelly's vibrant color, while the apple cider vinegar lowers the pH, making the jelly safer for long-term storage. Together, they create a balanced acidity that enhances the spice notes and prevents spoilage. Skipping either can result in a duller flavor or increased risk of fermentation.
What if my jelly doesn't set properly during the gel test?
If the jelly doesn't wrinkle when chilled, it needs more cooking time. Return the pot to a full boil and stir constantly for an additional 2-3 minutes, then test again. Overcooking can scorch the jelly, so keep a close eye on it. If it still doesn't set, you may need to add 1/2 teaspoon of powdered pectin (if available) and boil for 5 more minutes.
Can I adjust the spice level in this recipe?
For a milder flavor, reduce the cinnamon to 1/2 teaspoon and omit the cloves. If you love bold spices, add 1/4 teaspoon of ground nutmeg or 1/2 teaspoon of allspice. Just remember that spices intensify during storage, so start conservatively. The key is balancing the warmth without overpowering the apple's natural sweetness.
How do I know if my sealed jars are properly canned and safe to eat?
After cooling for 12-24 hours, press the center of each lid. If it doesn't pop back up, the jar is sealed. You'll also hear a satisfying "ping" sound as the lids seal. If any lids don't seal, refrigerate and use those jars within 1 week. Properly sealed jars stored in a cool, dark place will last up to 1 year—always check for bulging or leaking before opening.