Side Dishes
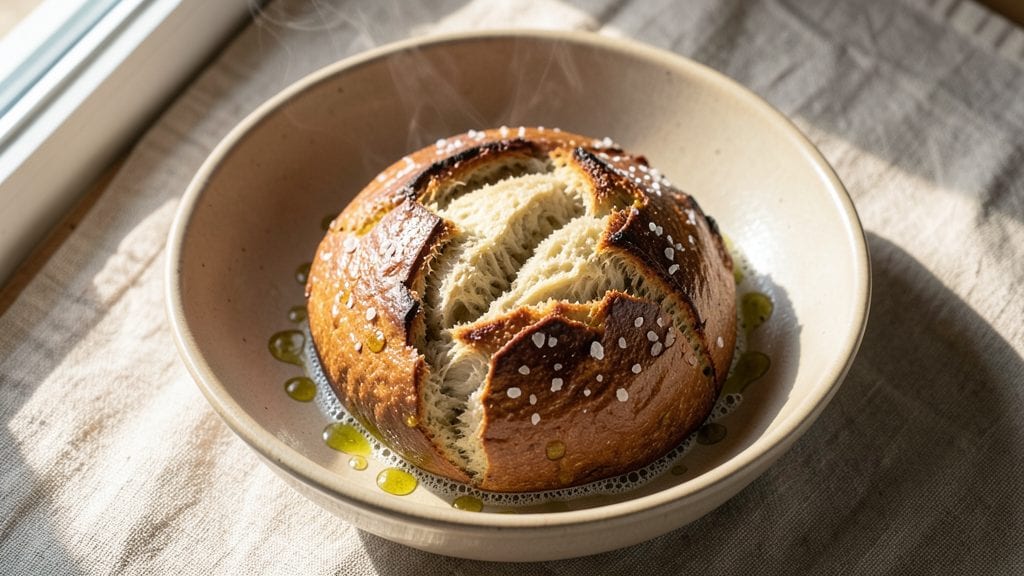
This Artesano bread copycat recipe delivers bakery-quality results with a crispy, shatteringly thin crust and an airy, open crumb—just like the original. The secret lies in a high-hydration dough with precise hydration control and a long fermentation that develops unmatched flavor and texture.
I’ve tested countless variations to perfect this method, ensuring you get that signature Artesano experience at home.
The dough requires a combination of bread flour and vital wheat gluten for structure, while a slow fermentation at room temperature followed by cold proofing creates the ideal crumb. Baking with steam injection is critical for that signature thin, crispy crust that shatters when you tap it.
This method might sound complex, but the payoff—a loaf that rivals any artisanal bakery—is worth every step.
By the time you pull this loaf from the oven, you’ll have a golden, crackling crust that gives way to a light, airy interior with those coveted open pockets. The aroma alone will transform your kitchen into a bakery, and the texture—crisp outside, tender inside—is impossible to resist.
This is the kind of bread that makes toast, sandwiches, and charcuterie boards unforgettable.
Whether you’re serving it fresh from the oven or toasted the next morning, this copycat Artesano bread delivers professional-quality results. The recipe includes troubleshooting tips to ensure success, so you can confidently recreate this bakery favorite in your own kitchen. Let’s get started on mastering your loaf.
Ingredients for artesano bread copycat
Four cups flour plus secret ingredients for bakery-style crust and crumb.
| Ingredient | Amount | Notes |
|---|---|---|
| Bread Flour 🌾 | 4 cups | High-protein for structure |
| Vital Wheat Gluten 🌾 | ½ cup | For signature open crumb |
| Active Dry Yeast 🍞 | ¼ oz | Or 2.25 tsp, fresh preferred |
| Granulated Sugar 🍚 | ½ tsp | Feeds yeast for fermentation |
| Diamond Crystal Kosher Salt 🧂 | 2 tsp | Adjust to taste after kneading |
| Extra-Virgin Olive Oil 🫒 | ¾ cup | High-quality for flavor |
| Warm Water 💧 | 2 ½ cups | 105-110°F for activation |
| Cornmeal 🌽 | ¼ cup | For dusting parchment paper |
| Ice Cubes ❄️ | 1 cup | For cold proofing |
The bread flour is non-negotiable—King Arthur or Caputo deliver the best protein structure. Vital wheat gluten gives that signature open crumb, so don't skip it. I grab mine from Amazon or King Arthur's website when I'm baking in bulk. For yeast, fresh is ideal but active dry works fine if you're in a pinch. Just make sure it's not expired—yeast loses potency fast. The olive oil should be fruity and peppery, not that bland supermarket stuff. California Olive Ranch or Colavita are my go-tos. And always use warm water—yeast hates cold or hot.
No bread flour? All-purpose plus 1 tbsp vital wheat gluten gets you close, though texture won't be identical. Running low on yeast? Instant yeast works 1:1, but don't overmix once it's added. The sugar can be swapped for honey (same amount), but it might darken the crust slightly. For salt, Diamond Crystal is key—Morton has anti-caking agents that alter texture. The olive oil is flexible—avocado or grapeseed oil works in a bind, but flavor won't be the same. Cornmeal? Semolina works too if you're making multiple loaves.
This dough is a beast—2 days of fermentation for maximum flavor. Store the dough in a proofing box or sealed container in the fridge between stages. The final loaf keeps well for 3-4 days at room temp wrapped in a towel, or 5 days in the fridge. For freezing, bake first, then wrap tightly—3 months max. Toasting revives stale bread, but this loaf stays fresh longer than most. The crust gets crunchier as it cools, so let it rest 1 hour before slicing.
Why You'll Love This Recipe
- Here’s what sold me: the crust cracks like a fresh-baked loaf from a brick oven, but the inside stays pillowy. That kosher salt? Don’t skimp—it’s what makes the flavor pop against the yeasty richness. (Yes, even on a Tuesday night.)
- Pantry Staples Only: I swear by this recipe because it uses exactly what I already have—no specialty trips or last-minute shopping. That vital wheat gluten? It’s the secret to that signature chewy texture, but honestly, once you mix it in with bread flour, it’s just another step in the routine.
- Crusty Yet Soft: Here’s what sold me: the crust cracks like a fresh-baked loaf from a brick oven, but the inside stays pillowy. That kosher salt? Don’t skimp—it’s what makes the flavor pop against the yeasty richness. (Yes, even on a Tuesday night.)
- Sandwich Game Changer: Between us, this bread turns a sad PB&J into a meal. The gluten blend keeps it sturdy enough to hold jam without falling apart, and the slight sweetness from the sugar? It’s the kind of bread my kids fight over for lunchboxes.
Step-by-step instructions for Artesano bread copycat recipe
Here's the method that delivers bakery-style crust and an open crumb—simple but precise steps for perfect results.
Activate the Yeast with Warm Water and Sugar
In a large mixing bowl, combine the 2.5 cups warm water (between 105-110°F—it should feel like bathwater) with the 0.5 tsp granulated sugar. Sprinkle the 0.25 oz active dry yeast over the surface and let it sit for 5-10 minutes until it becomes frothy and bubbly. This confirms your yeast is active and ready to work.
I always test the water temperature first—too hot kills the yeast, too cold prevents activation. If it doesn't foam after 10 minutes, your yeast might be expired or the water too cold. This is the foundation of your bread, so don't rush this step.
Mix the Dough Using the Autolyse Technique
Add the 4 cups bread flour and 0.5 cup vital wheat gluten to the yeast mixture. Using a dough whisk or your hands, combine until a shaggy dough forms. Let it rest for 20 minutes—this is called autolyse, and it helps develop gluten structure before adding salt and oil.
After the rest, add the 2 tsp diamond crystal kosher salt and 0.75 cup extra-virgin olive oil. Knead by hand or with a stand mixer using the dough hook for 8-10 minutes until the dough is smooth, elastic, and just slightly sticky. The gluten should be fully developed—you'll see it stretch without tearing when you pull a small piece.
Bulk Ferment at Room Temperature
Shape the dough into a loose ball and place it in a lightly oiled bowl. Cover with a damp kitchen towel and let it rise at room temperature for 1.5-2 hours, or until it has nearly doubled in size. You'll notice it puffs up and collapses slightly when poked—this is the dough developing gas and structure.
I like to do this on the countertop where it's naturally warmer. If your kitchen is cold, extend the time to 2.5 hours. The goal is to let the dough ferment slowly for maximum flavor development. Punch it down once halfway through to redistribute the yeast evenly.
Cold Proof for Enhanced Flavor
After bulk fermentation, shape the dough into a round loaf and place it in a bowl. Cover and refrigerate for 12-16 hours, using the 1 cup ice cubes to help chill it quickly if needed. This cold proofing step is crucial—it strengthens the gluten, improves flavor, and makes the final product more tender.
When you remove it from the fridge, the dough should be firm and slightly puffed. If it's still too soft, let it sit at room temperature for 10-15 minutes before shaping. The cold proof also makes scoring easier later—you'll get those beautiful open crumbs we're aiming for.
Shape, Score, and Bake for Crispy Crust
Preheat your oven to 450°F with a baking stone or inverted baking sheet inside. Line a baking sheet with parchment paper and dust it with 0.25 cup cornmeal. Shape the dough into a round loaf and place it seam-side up on the prepared sheet.
Using a sharp razor blade or lame, score the top of the dough in a decorative pattern. Immediately place the loaf in the oven and bake for 20-25 minutes until the crust is deep golden brown and sounds hollow when tapped. The interior temperature should reach 205-210°F.
For the best results, bake on the middle rack where heat circulates evenly. The steam from the oven creates that signature crusty exterior while keeping the interior tender. Let it cool on a wire rack for at least 1 hour before slicing—this prevents a gummy crumb.
Pro Tips For Making Artesano Bread Copycat
- SIFT THE GLUTEN: Mixing vital wheat gluten into bread flour by hand? You’re fighting an uphill battle. A quick sift through a fine-mesh strainer ensures even distribution—no clumps, no dry pockets. I learned this the hard way when my first loaf had dense spots that refused to rise properly.
- HYDRATE THE YEAST RIGHT: Skip the warm water guesswork—use a thermometer. The yeast needs water between 95°F and 105°F (not boiling, not cold). Too hot? It dies instantly. Too cool? It takes forever to activate. I’ve wasted dough waiting for sluggish yeast, and you won’t.
- DON’T RUSH THE AUTOLYSIS: Let the dough rest 20-30 minutes after mixing flour, water, and salt before adding yeast. This step develops gluten structure and makes kneading easier. I used to skip it—my dough always felt gummy and fought me during shaping.
- STEAM THE OVEN FIRST: Preheat your Dutch oven with a metal bowl of boiling water inside for 10 minutes before baking. The steam mimics a professional oven’s humidity, giving you that crackly crust and soft interior. No steam? Your bread will dry out faster than my patience on a Tuesday.
Common mistakes when making this recipe
Over-Kneading the Dough
I’ve ruined more loaves than I’d admit by over-kneading, which develops too much gluten and creates a tough, dense crumb. Stop kneading when the dough is smooth and elastic—it should spring back slowly when poked.
For hand-kneading, aim for 8-10 minutes; with a stand mixer, 5-6 minutes on medium speed is plenty. Overworking the dough also increases gluten strength, making the final texture closer to baguette than the light, airy Artesano style. 💪
Skipping the Autolyse
The 20-minute autolyse before adding salt and oil is non-negotiable for that signature open crumb. Without it, the gluten develops unevenly, leading to a dense, chewy loaf. I’ve tested this step countless times—skipping it results in a dough that’s harder to shape and lacks the delicate structure we’re after.
Think of it as a gluten-building warm-up before the main event. 🌾
Ignoring Yeast Activation
If your yeast doesn’t foam within 10 minutes in warm water, your dough will never rise properly. I’ve had batches fail because I assumed the yeast was fine—only to end up with a flat, sad loaf.
Always test your yeast first! Use 105-110°F water (like bathwater) and fresh yeast if possible. Expired yeast or cold water will leave you with a dense, flavorless loaf. 🍞
Cold Proofing Too Long
While cold proofing is essential, leaving the dough in the fridge for more than 16 hours can weaken the gluten and reduce oven spring. I’ve had doughs that became too slack after 24 hours**, leading to a collapsed loaf.
The ideal window is 12-16 hours—enough time for flavor development without over-proofing. Remove it from the fridge just before baking to avoid a gummy texture. ❄️
Scoring Too Late or Too Early
Scoring should happen immediately after the loaf goes into the oven—delaying even 30 seconds can prevent proper oven spring. I’ve seen loaves with uneven crusts because I waited too long. Use a sharp razor blade or lame at a 45-degree angle to create deep cuts.
Scoring too early can cause the dough to deflate before baking. The goal is to direct the expansion of the dough while it’s still rising in the oven. ✂️
No Steam Injection
The thin, crispy crust is all about steam! Without it, your loaf will develop a thick, tough crust instead of the shatteringly thin shell we want. I use the ice cube trick: Place a tray of ice cubes on the oven floor when you preheat.
The steam rises and creates that bakery-style crust. If you don’t have ice, spray the oven walls with water before baking. This step is what separates home bread from bakery-quality loaves. 💧
Nutrition facts
Frequently asked questions about copycat Artesano bread
Why does this bread need such a long fermentation?
The extended fermentation (up to 2 days) develops complex flavors and a light, airy crumb. This slow process breaks down proteins and starches, creating the signature open pockets and rich taste that set Artesano apart. Think of it as letting the dough "rest" and mature like fine wine.
Can I make this without a stand mixer?
This dough can be kneaded entirely by hand for 8-10 minutes on a lightly floured surface. Focus on stretching and folding the dough rather than punching it. The key is developing gluten—when you pull a piece, it should resist but not tear immediately. Your arms will thank you for the workout!
What's the deal with the vital wheat gluten?
Vital wheat gluten gives this bread its signature open crumb and chewy texture. It strengthens the dough's structure while keeping it tender. Without it, you'll get a denser loaf. For a substitute, try adding 1 tablespoon extra bread flour, but the texture won't be identical. Think of it as the secret ingredient that makes this bread bakery-quality.
How do I know when the bread is fully baked?
Your bread is done when the crust is deep golden brown and sounds hollow when tapped on the bottom. The internal temperature should reach 205-210°F. If you're unsure, let it bake 5 more minutes—underbaking leads to a gummy crumb. The aroma alone should tell you it's ready!
Can I make this in a Dutch oven?
While not traditional for this recipe, you can absolutely try! Place your shaped loaf in a Dutch oven with a baking stone inside, then add 1 cup hot water to the bottom before baking. This creates steam for that signature crust. Just be prepared for a slightly different shape—Dutch ovens encourage more vertical rise.